
Introduction
to drawing & the human Figure (or “Step One”) –
Drawing, or any Art form really, begins
with pleasure and satisfaction.
No matter what the results – Did you
enjoy doing it?!
This is what counts. It has to be
important to YOU.
Everything improves with practice,
attempts, experience and experiments.
Every level can be fun as long you see it
that way.
Do not exasperate yourself with
dissatisfaction.
Humility is essential. For a true
Artist actual perfection is impossible, there is always some
perhaps minor flaw or oversight. But you can get darn close.
If you think anything is absolutely perfect
you are not being humble. If you are not being humble you are inviting an
arrogant breakdown earning little respect from fellow artists and eventually
the general public.
The satisfaction is sufficient. But
there should also be some pieces that end up in the wastebasket.
By the by, Art does take the virtues of
patience and fortitude.
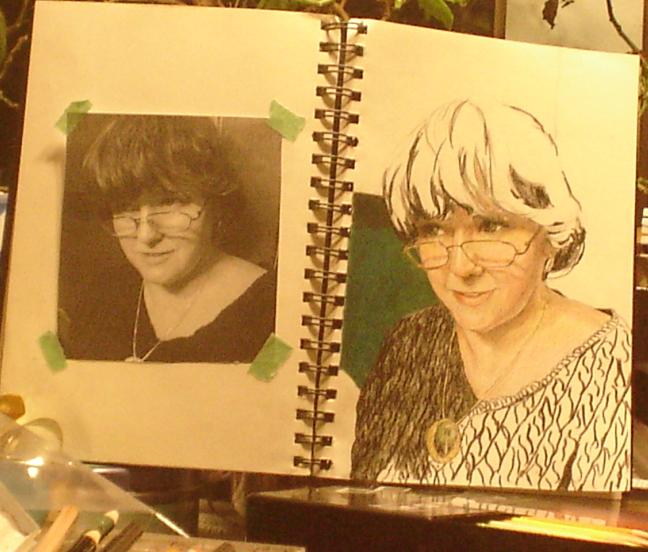
Start by selecting a color photo of the
subject (animal; domestic human or pet) of your choice. Although wild can
be rather entertaining as well…
Casual photos can show more
“life” if that is what you want to achieve. It is a personal
preference.

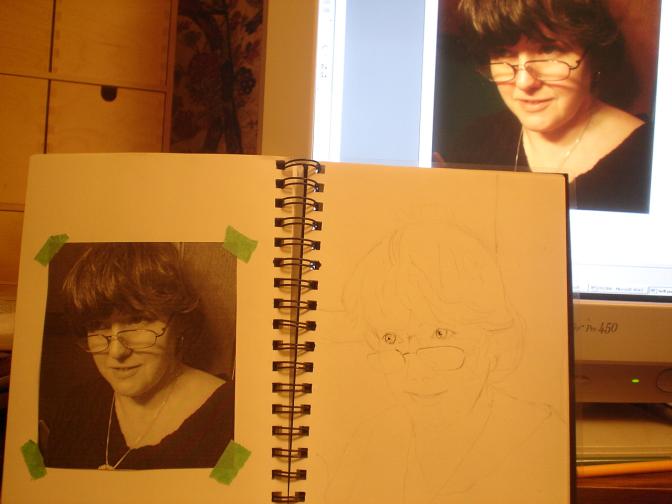
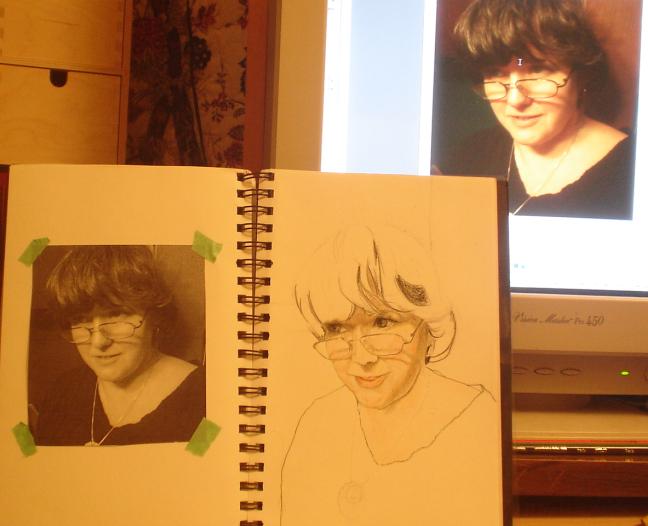
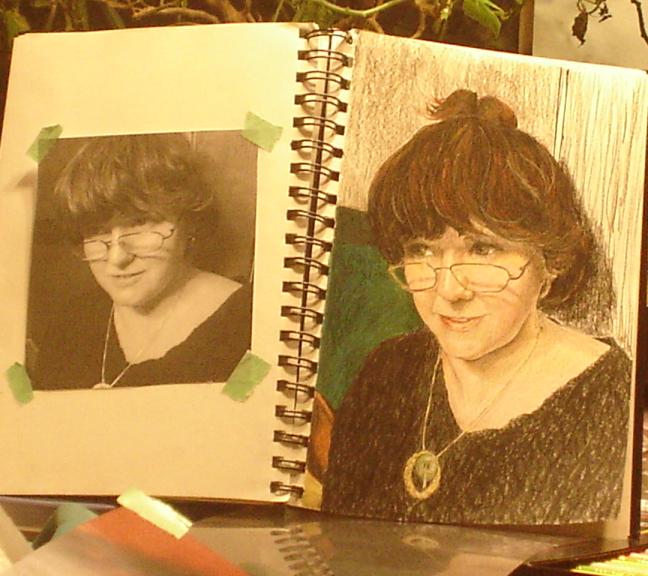
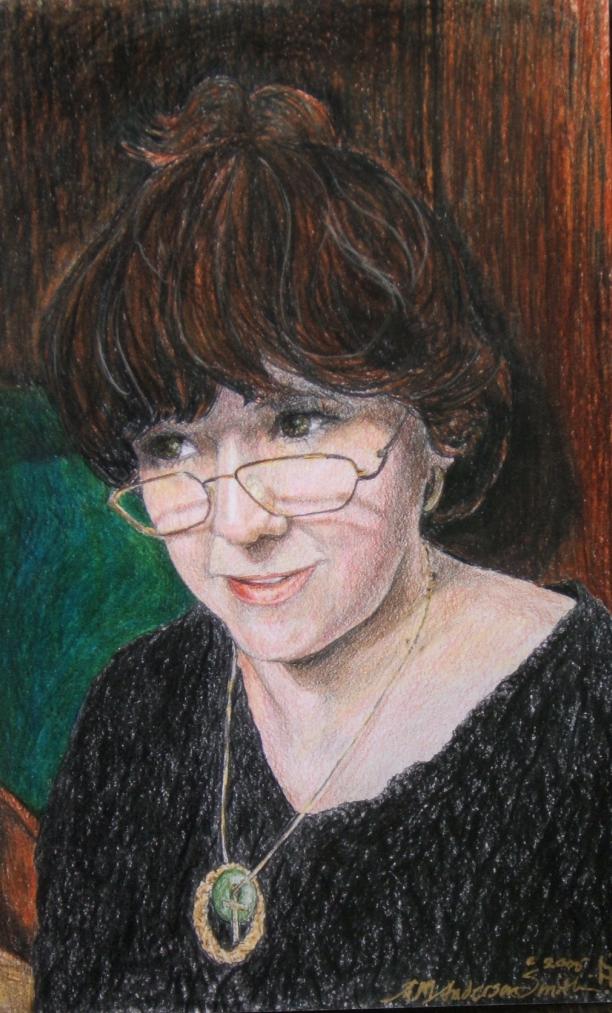
This is a simple “testing the digital
camera” self-portrait photo. It seemed best not to use any of the
others as an experimental subject for this procedural demo.
Best to inflict upon yourself.

Make a black & white printed copy enlarged
to the desired size of your piece, secure to the back with a softly adhering
acid free tape. Using light from behind (light board or window), SOFTLY
trace the general outlines and main location of features and other important
points.
Here the graphite pencil did not photograph
well. So, the main lines of the eyes, glasses and mouth were touched with
Sepia to help give an idea of the placement of the subject on the paper making
it easier to note the positioning of softer lines.
[Or, if you like; SOFTLY draw a guiding
sketch, where enlarging on scrap paper with grid is helpful especially on
larger pieces.
OR: Scan-copy onto a thin plastic sheet, and
use an overhead to project it onto your larger paper.]
Find your comfortable way to hold
the pencil with true control. Professors mainly taught loose control like
holding chalk to use on the blackboard. But for perfect control of a
pencil, in the subtle spaces to be covered, it is best to hold it resting
between your index and middle finger instead of the index finger and
thumb. Just put that thumb to work for security and the pencil
won’t slip. Work gently with a very sharp pencil and be sure to
keep the sharpener close by.
After gently marking the features, fill the
flesh space. NOT the eye, with an appropriate soft, light, main tone;
beige, light peach, peach. No matter what the genealogical heritage of the
human subject could be; one of these tones would be there somewhere.
When doing the skin, try to steer away from
cold colors - even if they are in the photograph. Warmth adds to the soft depth
of the portrait, cold takes away.
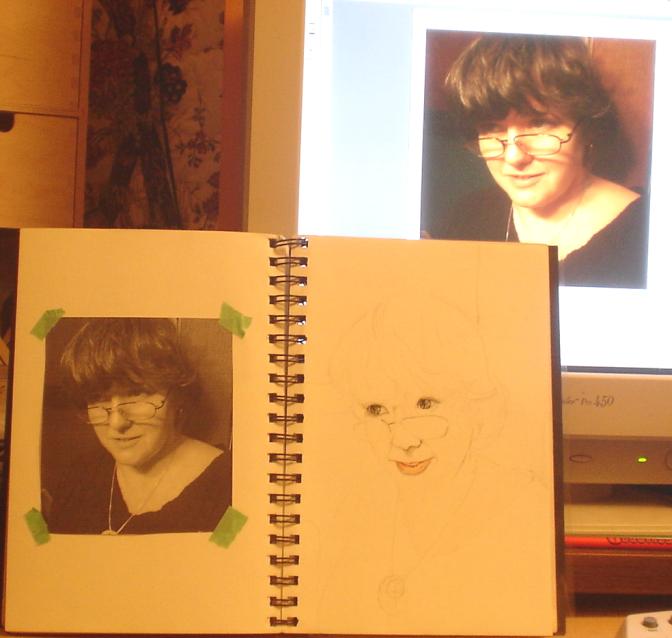
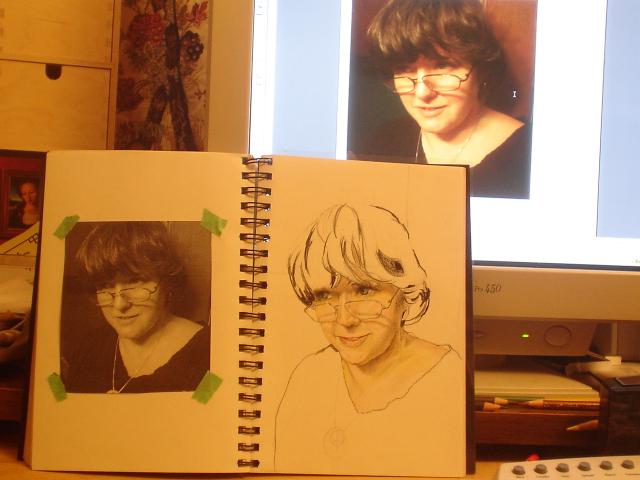
It is best to start now with the eyes, if
only for inspiration to continue. They are the most difficult part to do.
If a mistake is to occur, let it be now, before too much shading and detail is
attempted. Looking back to improve will be done throughout the project.
Be sure to leave the reflective light points in the iris and pupil, even
if the eye color is very dark, this adds personality and depth. The edge
ring of the Iris is usually a darker tone that should be securely placed.
This defines the ‘gleam’ and ‘twinkle’ that adds
personality to the piece. Cloud Blue is used to show the contour of the
white of the eye.
Here the colors used are; Olive Green,
Light Umber and Black – very sharp fine points.
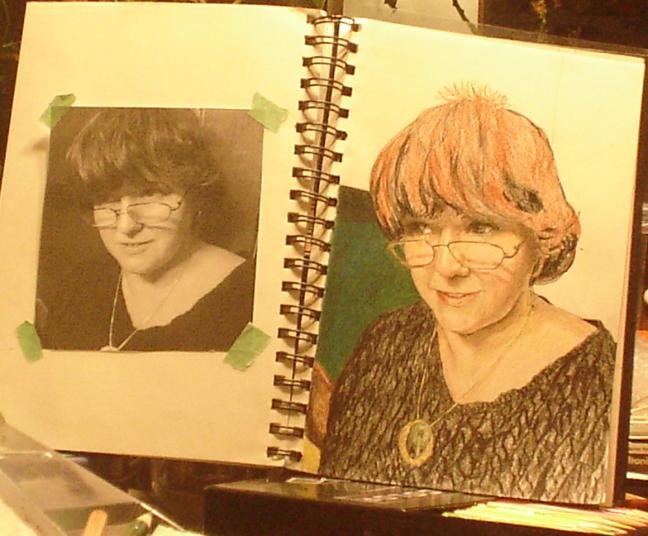
Slowly and softly start the shading of the
complexion, you can always add more – you can’t always take away.
The main colors used are: Sepia, Cream,
Peach, Lt. Peach, Pink, Blush Pink, Salmon Pink.
When working with a light color, BE SURE to
gently erase the graphite first or it will become a set-for-life smear
in that portion of the piece.
As far as contrast & shading; it is
amazing what a very thin touch of black at the edges of light or the strong
shadow points, do to provide depth.
The upper lip is generally a deeper
tone. The bottom lip is where varying shading comes into play; some
points seem almost white some are deep with rosy shadow.
But note that on men the variation in tone
is usually very mild - almost insignificant. It is just best at this
point to try for accuracy, you can always expand - carefully.
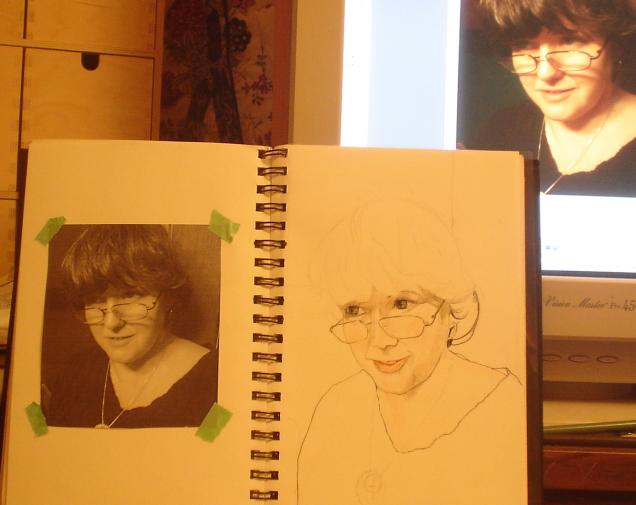
[Outlines are of Sepia, balanced with
Henna, Crimson Red and Blush Pink.]
This also shows the instigation of the soft
shadow of glasses, a nightmare to many artists. But challenges are
good. Again, start softly with sepia – a pencil artist’s
friend! Work slowly with the accuracy of the line’s shape -- layer
by Layer.
The main technique to achieve accuracy is
to look at each feature, point, or portion of the subject individually and from
varying angles.
Here is where turning the pictures sideways
or upside-down helps in the conception of perspective and proportion - obtain a
view of every angle. Just keep them both lying in the same direction
(topside down, sideways, etc.)
It is amazing how this improves the
precision.
Precision’s good…
Some instructors and professors swear that
is almost imperative to finish each feature or portion of a piece concentrating
on one section at a time. But, logic shows that it is best to find your own
“flow”. For many, the balance blends if you step away and
come back. Shifting to another feature. Sometimes interruptions
alert you to a challenge that’s forming. Upon returning, you can more
easily become aware of the solutions.
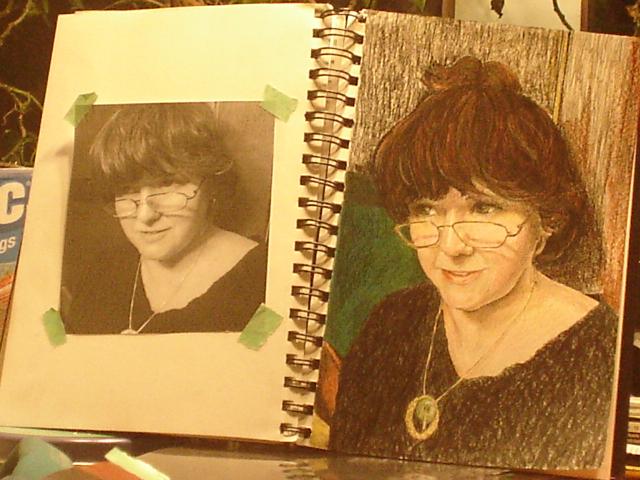
Metal is an interesting challenge with
pencil.
The Metallic Gold pencil is very dark in
tone working best as the shadow of golden portions, with a lighter yellow for
the gleaming points of the segment for glasses … or jewelry.
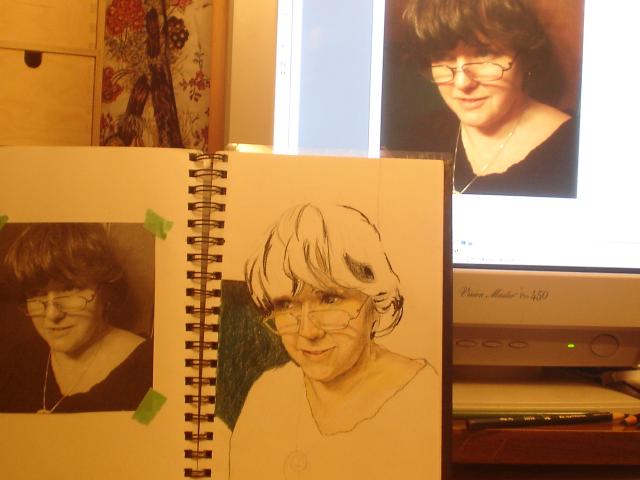
Doing one of the background colors (in this
case a blend of three greens) makes the depth and proportion become more
visible.
It’s good to get that warm feeling of
satisfaction, as you’re moving along.
[Olive Green, Marine Green, Dark Green]
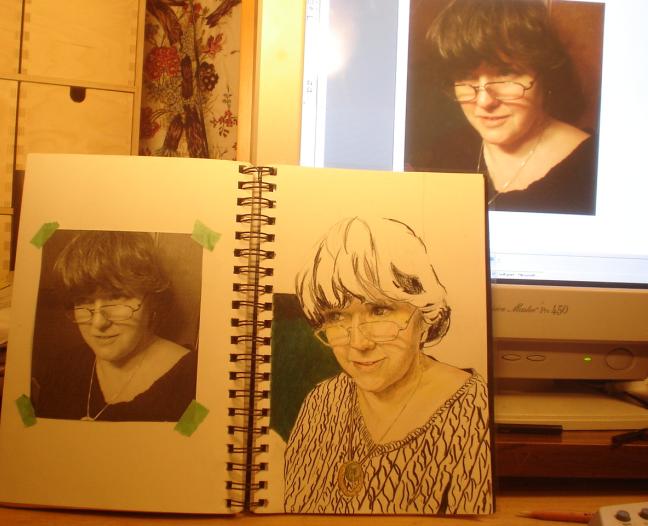
The lighter tones of the jade and gold of
the necklace, cross and palm ring (made fresh each year with a piece of palm
leaf on Palm Sunday at St. Madeleine Sophie Catholic Church), had to be
finished and secured before doing the dramatic black lines of the
sweater. Yellow Ochre If deep colors are done first light colors
cannot be used on the same space unless erasing is possible. Since that
is not likely – think watercolor! Light tones first.
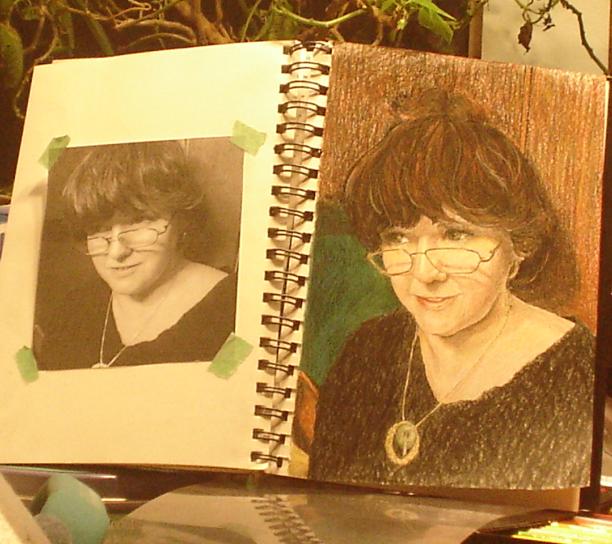
As can be noted with the smoothness of the
green background, a Colorless Blender® pencil was used on the
“wall.” This is an excellent effect that is used everywhere
in this piece except the face and necklace.
When items are detailed, blending seems to
smear more than smooth.
The skin and necklace need to remain soft,
subtle and precise.
Continuing to work in the facial shading,
while doing a light ‘coat’ of black on the sweater. The fiber
knitting lines help a great deal in dimension and proportion for depth.
Note how they narrow in division and softly shift in angle following the
flowing line.
Wanting a definite contrast between the
depth of the shadowed knitting lines and the lighter surface shade a subtle
layer of the same Black is used. Adjusted with the photo’s lighting
to finish the sweater shape with the tone desired, same color just variance of
concentration.
Background woodwork was begun here more for
reassurance of depth. Four brown tones to be blended were used.
Dark Umber, Dark Brown, Tuscan Red, Terra
Cotta.
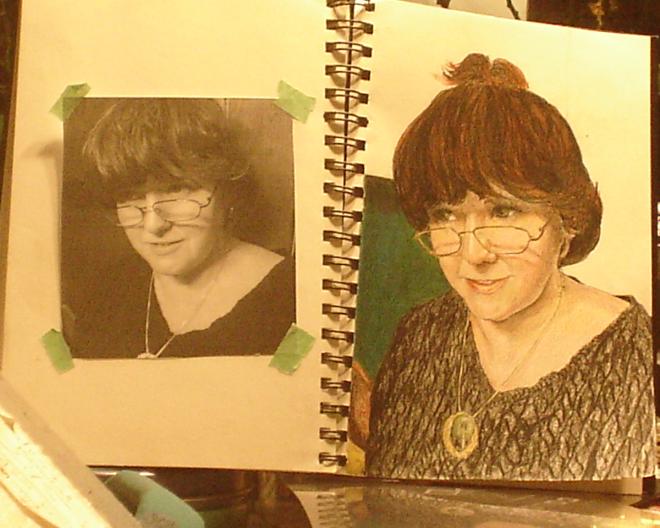
For the colorful sections of hair begin
with the lighter base tone, you can always go darker, very seldom lighter.
After the Colorless Blender® was used
with Sienna Brown, lines of the darker tones were begun. A look in the
mirroring of the breakfast-nook window was enough guidance as for the ends of
the “French-clipped” hair. This satisfied the decision to
expand the subject rather than trim the paper, solving the problem of
disproportion between the photo and the paper.
Henna, Sepia, Terra Cotta, Tuscan Red, Dark
Umber, Light Umber, Dark Brown with, of course, Black.
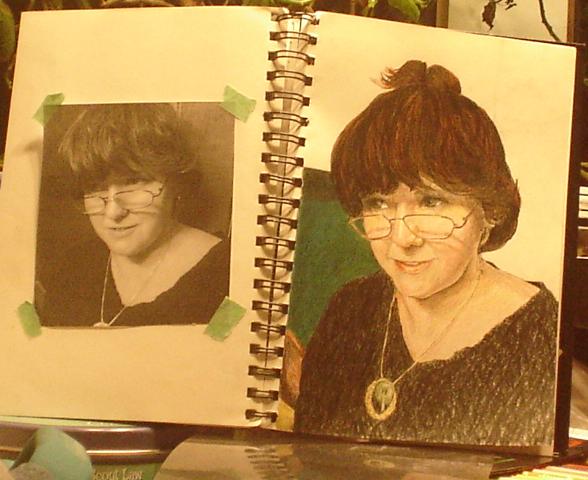
The sweater was rubbed with Colorless
Blender® to finish the base surface tone without losing the shading effect.
Paying attention?
Hopefully the slow variations in the toning
of the shadows on the skin have been noticed by now.
A key word: subtle.
Before the upper section of background is
confronted, it is best to finish the subtle silvering of the hair (frosted
– by God) and Tuscan Red highlights.
Beginning the background woodwork just try
to keep grain and seam tones darker.
Continuing the deeper toning of the wooden
cabinet, shading mainly with Black.
Improving the facial shadows especially
above eyes. Even though the eyes can become almost invisible in shade try
to let them show their own sparkle, balance the shadow around them with Sepia
and Dark Brown.
This is one aspect of dissatisfaction in
High School and College projects. It never felt as “alive” as
intended. The secret answer here is to liven up the eyes; this helps
dramatically.
Complete wood tones for blending..
Blend by applying pressure going with the
direction of the wood-grain but in small sections
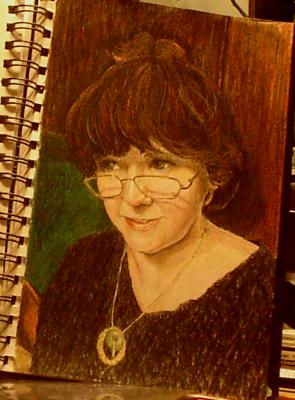

Note a touch of light tone to edges of the
hair where the background is very dark. This satisfies the desire to have
the value of the figure project and differentiate from the background.
--------------
It is always good to bring in a little of
the background color when finishing the main points of shadow in the face the
face or fur. For example; On the piece titled New Nephew , looking
at the piece and photo upside down it was noticed that his Auntie’s rosy
shirt “reflected” above his eyes. Softly touching that
portion with the same pencil completed the tonal balance of the piece, adding
depth.

New Nephew –©
2005
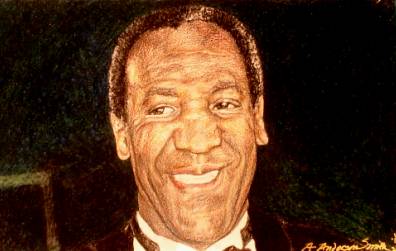
Bill
Cosby –©2005
Now that you have been given all of these
rules, guidelines & tips; follow what you will. For any artist your
own “objective” or wish to attempt whatever YOU want to achieve is
most important. Hopefully these strategies will help you to reach your
own goal.
Please keep in
mind, what several more noble instructors have told me:
Rules
were made to be broken!
